Ever see paper pulp art? There are several varieties available at TimesTinCup.com . Not only does paper pulp art make for sweet decor; but, it also makes for brilliant craft projects.
MATERIALS FOR PAPER CLAY RECIPE
1/2 Cup Paper Pulp (1/4-1/2 roll white Toilet Paper with no lotion)
Use about 1 ounce of dry TP – It should weigh about 4 ounces; about, when wet
Digital Food Scale
Warm Water in Large Bowl
Old Cotton Napkin or Handkerchief
1/2 Cup White School Glue
1/2 cup Drywall Joint Compound
1/2 Cornstarch
1 cup All-purpose Flour divided in half
3 Tablespoons Mineral or Baby Oil
Large Mixing Bowl (craft use only)
Measuring Cups and Spoons
Varies types of tools for sculpting
Soft artists brush
Fine grit sandpaper
MAKING PAPER PULP
1- Weigh out about 1 ounce of dry toilet paper.
2- Place TP in a large bowl of warm water. Let stand for a few minutes.
3- With your hands, swirl and break the paper apart.
4- Once it is thoroughly soaked, drain off excess water.
5- Place the pulp in the center of a piece of a cotton napkin. An old handkerchief works well for this.
6- Squeeze this until no more water flows out.
7- Remove from the cloth and measure out 1/2 Cup. Pulp should weigh about 4 ounces. TIP: You may have some left over TP pulp depending upon the type of tissue you used. This is great to use as texture in your art or to make a sheet or two of paper.
8- Place the pulp in large bowl. TIP: Take the time to tear any large lumps apart with hands. The pieces should be pea size or smaller before you mix in other ingredients.
9- Mix the glue in first.
10- Get your hands in there and work it into the fibers. It will be sticky.
11- Add the joint compound next and work it into the mixture with your hands. Then add in the dry ingredients and the oil, reserve 1/2 C of flour. DISCLAIMER: Some recipes say that you can use a mixer with a dough hook… if you are willing to get craft materials on your appliances. I was not keen on this. I prefer to mix this by hand.
12- Mix in the remaining flour 1/4 C at a time until the consistency feels right to you.
13- Add more flour or cornstarch into the bowl for kneading.
14- Knead the mixture until it becomes the consistency you want. You will have an ample handful of clay with this recipe.
15- If you squeeze a little of the dough in between your fingers and it holds; it is ready to use for sculpting.
You will have to play with different ways to mold your pulp clay. One suggestion is to pinch off about a heaping teaspoon of clay and roll it into a ball in the palms of your hands. Place it on a hard surface and smash it with the bottom of a sturdy glass for flat pieces. You really have to play with various methods depending on what you are trying to create with a medium like pulp clay. Paper clay will not create perfect shapes every time. However, imperfections are totally normal when making handmade items. It gives the art character.
16- Place your sculpture on a wire rack and allow to dry several hours or overnight.
17- Brush off the excess cornstarch with a soft brush.
18- Sand with fine grit sandpaper if desired.
19- The sculpture is ready for you to decorate and paint.
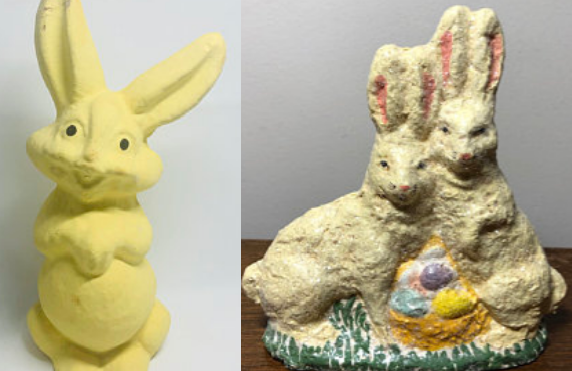
Air Dry Paper Pulp Sculpture
Discover more from ANTIQUES, VINTAGE
Subscribe to get the latest posts sent to your email.